This is how the work gets done…
My recently purchased 50mm (f/1/8) camera lens arrived last week. A 28-135mm lens is my standard when taking images of work. It gives me flexibility with the ability to shoot sharp details throughout the entire range.
The new lens is far less flexible; with a fixed focal length, it has a relatively short depth of field. But, my thinking was that it would provide excellent images of larger work where actual viewing distance won’t allow the 28-135mm lens to capture the entire piece (yeah, I tell myself that all the time, “I should work smaller.”).
So then, I set up a little exercise to record my glaze process as a way to see what the lens would do (in spite of my incompetency). I learned several things during my self-imposed drill. Two of the most notable:
1. Don’t rely on the auto focus (AF). I employed the AF and timer for most of the shots because my hands were otherwise occupied with glazing.
2. As if I hadn’t already realized, this exercise amplified the fact that my glaze process is tedious.
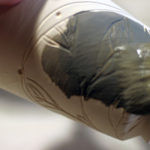 Apply a fairly thin layer of slip* over the drawn area.
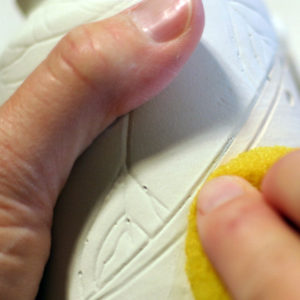
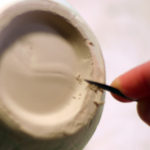
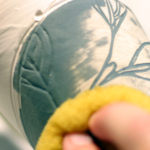 With a sponge and water, wipe back the slip; leaving the color in the recesses of the drawing.
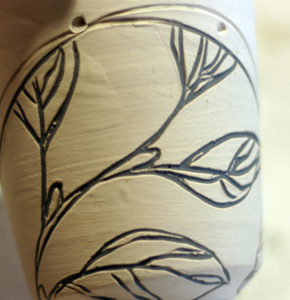
Cleaned up drawn image on bisque.
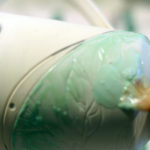
 A quick dip over the drawn area in a glossy clear glaze. Thin application.
(AF frustration!)
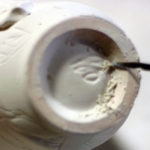 When the glaze can be handled without marring the newly applied glaze, dry foot (remove glaze) the bottom. I also clean the clear glaze from the interior foot ring so I can apply a color glaze in there later in the process.
 Carefully clean off the clear glaze with a sponge from all areas that will be glazed with a color later.
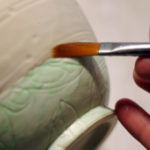
 Wax to cover only the areas glazed with the clear glaze.
Go to lunch!
Need to wait at least two hours for the wax to set up. Though, in the Arizona heat, it’s still a bit soft after two hours. However, allowing for much more time would dry the moisture in the bisqueware; creating a whole new set of problems.
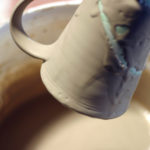 Dip the piece in the second, color glaze. Quickly sponge any residual glaze off the waxed areas.
 Dry foot (again). This time, leave the glaze in the foot ring.
 Lastly, clean up the edge of the color glaze where it meets the waxed area.
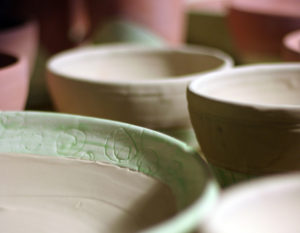
Ready to be loaded into the kiln!
 *For all the purists out there: I use the terms ‘slip’ and ‘engobe’ interchangeably (The stuff in my throwing bucket…that would be slurry).
Mistaké Slip ^5-6 (pronounced: mis-tock-ee)
Yes, that actually says ‘mistake’. The urban legend is that a grad student was trying to develop a stoney glaze and mistakenly created this slip. The revised pronunciation was an attempt to provide some legitimacy and confuse the undergraduates.
EPK or Grolleg 50
Custer 25
Flint 25
add: Macaloid 3
~for mid-range (^1-4), substitute Nepheline Syenite for Custer.
This slip is compatible on bisque (for most clay bodies…test, test, test) when applied thinly.
This Is How the Work Gets Done, Charlie Peacock.
3 Comments
Comments are closed.
That looks great and fun Beth. You’re such an artist. Thanks for the info.
Hi Beth
I apply the black slip on greenware. Especially on porcelain, I can get a cleaner line and background if I want that, but do need to be careful not to erase the lines with the sponge!
it’s a process…nice outcome. Shared detail always gives the rest of us an idea or two. Thanks
Thanks for sharing Beth. The photos really help explain your process. That’s another thing I need to do sometime…after I make more cups…